How To Configure Different Settings?

Here you will get a full guide about how to configure the settings of the TenancyBox tool.
Company Detail
To update your company details efficiently, follow these steps:
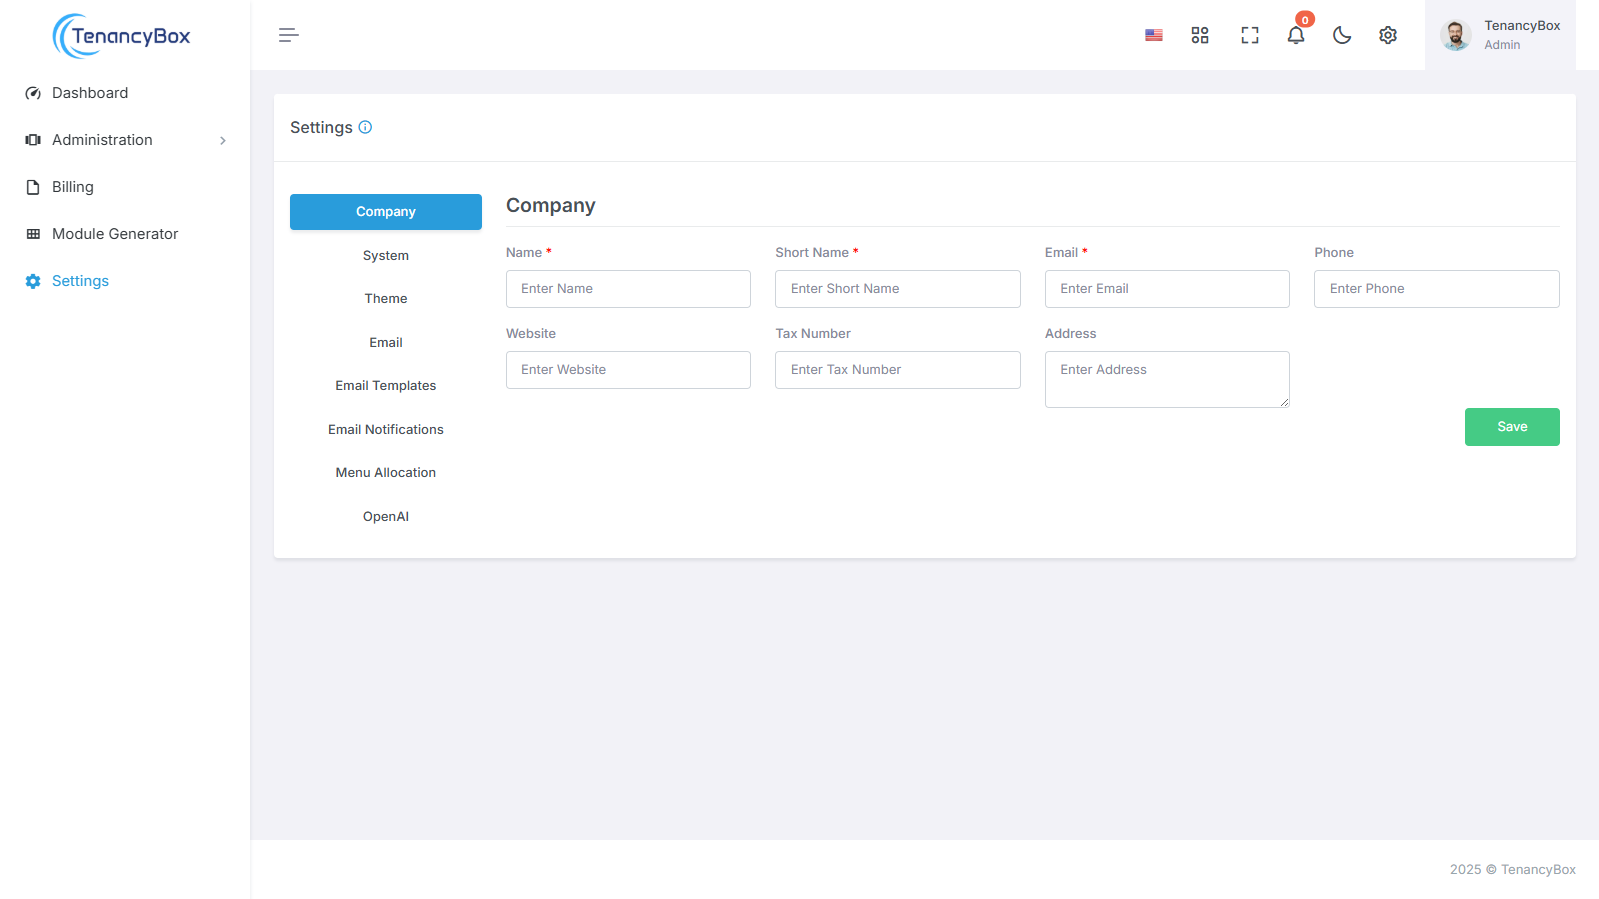
Name: Enter the full name of your company.
Short Name: Provide an abbreviated version of your company name if applicable.
Email: Update the company email address for correspondence.
Phone: Provide the company's contact phone number.
Website: Update the company's website URL.
Address: Enter the physical address of your company.
Additionally, to receive email notifications for daily work reports, please add Daily Work Report Emails to your preferences.
By following these steps, you can easily ensure that your company's information is accurate and up-to-date, while also enabling notifications for important daily work reports.
System Settings
Customizing your TenancyBox experience is effortless with our comprehensive system settings. Tailor your preferences to match your needs precisely using the following fields:
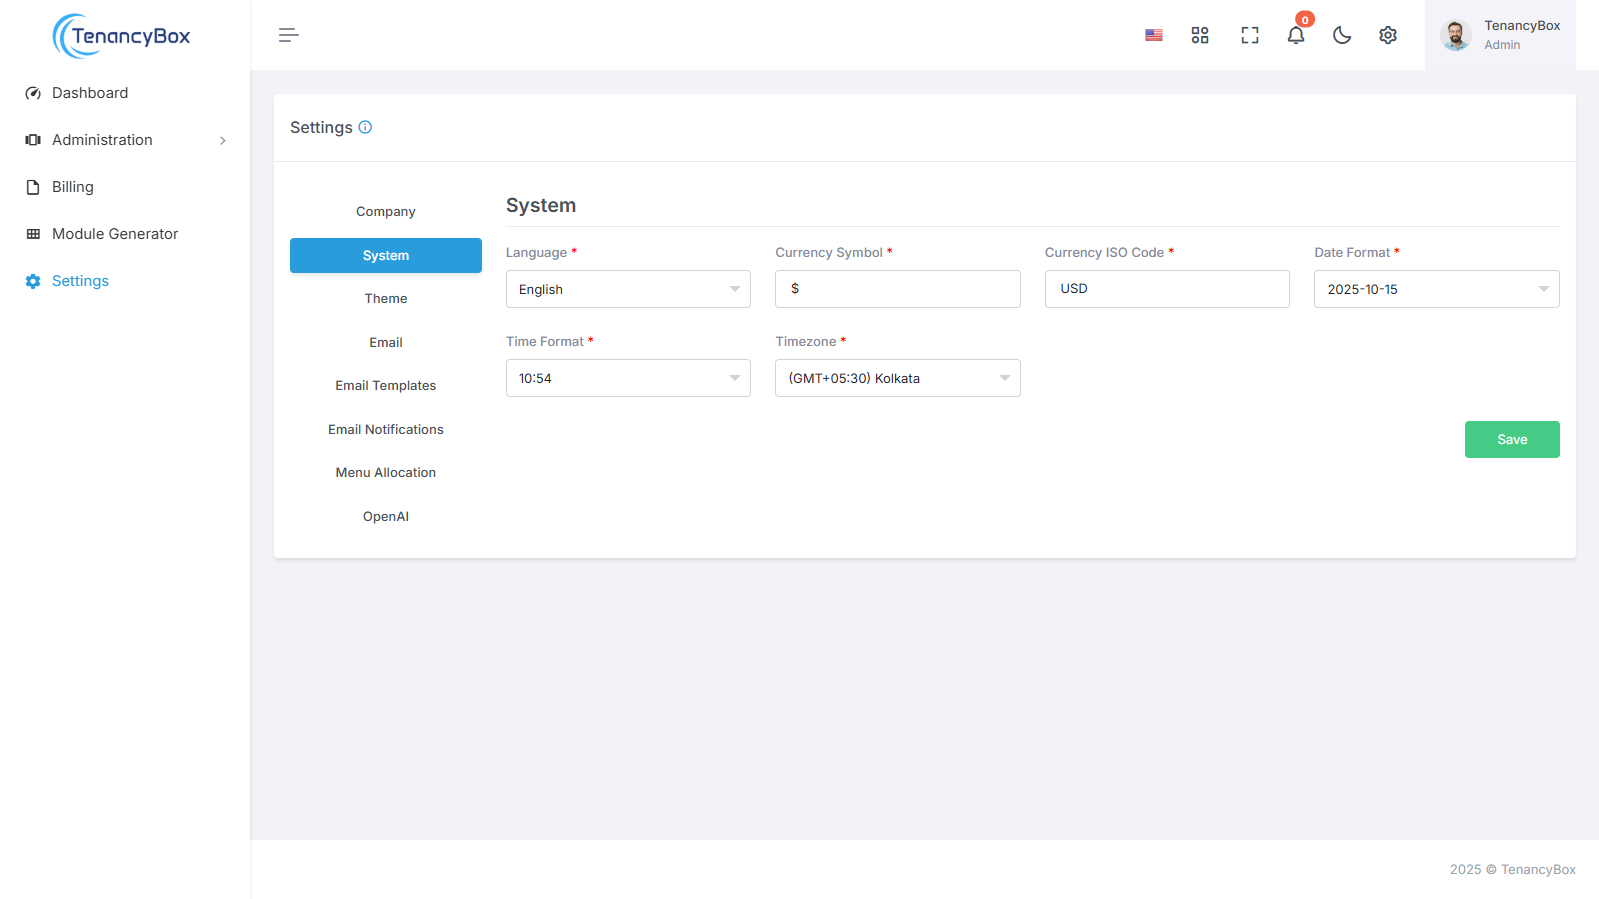
Language: Select from 14 built-in languages to navigate TenancyBox in your preferred language.
Currency Symbol: Define your currency symbol to match your local currency.
Currency ISO Code: Specify the ISO code for your currency for accurate representation in financial transactions.
Date Format: Customize the date format to align with your regional conventions.
Time Format: Choose between 12-hour and 24-hour time formats to suit your timekeeping preferences.
Time Zone: Set your time zone to accurately reflect your location.
With TenancyBox 's intuitive system settings, personalizing your experience has never been easier. Fine-tune TenancyBox to your exact specifications and enjoy seamless navigation tailored to your needs.
Theme Settings
To change your company logo, sidebar logo, and favicon in the system's theme settings, follow these steps:

Company Logo: Upload your company's logo image to replace the current one displayed in the system's header.
Sidebar Logo: Upload a logo image specifically designed for the sidebar, ensuring it fits appropriately and maintains clarity.
Favicon: Upload a favicon image to represent your company's branding in web browser tabs and bookmarks.
By updating these theme settings with your company's logos and favicon, you can ensure consistent branding and visual representation across the system, enhancing recognition and professionalism.
Email
To change your Change your mail settings for outgoing mail from the tool.
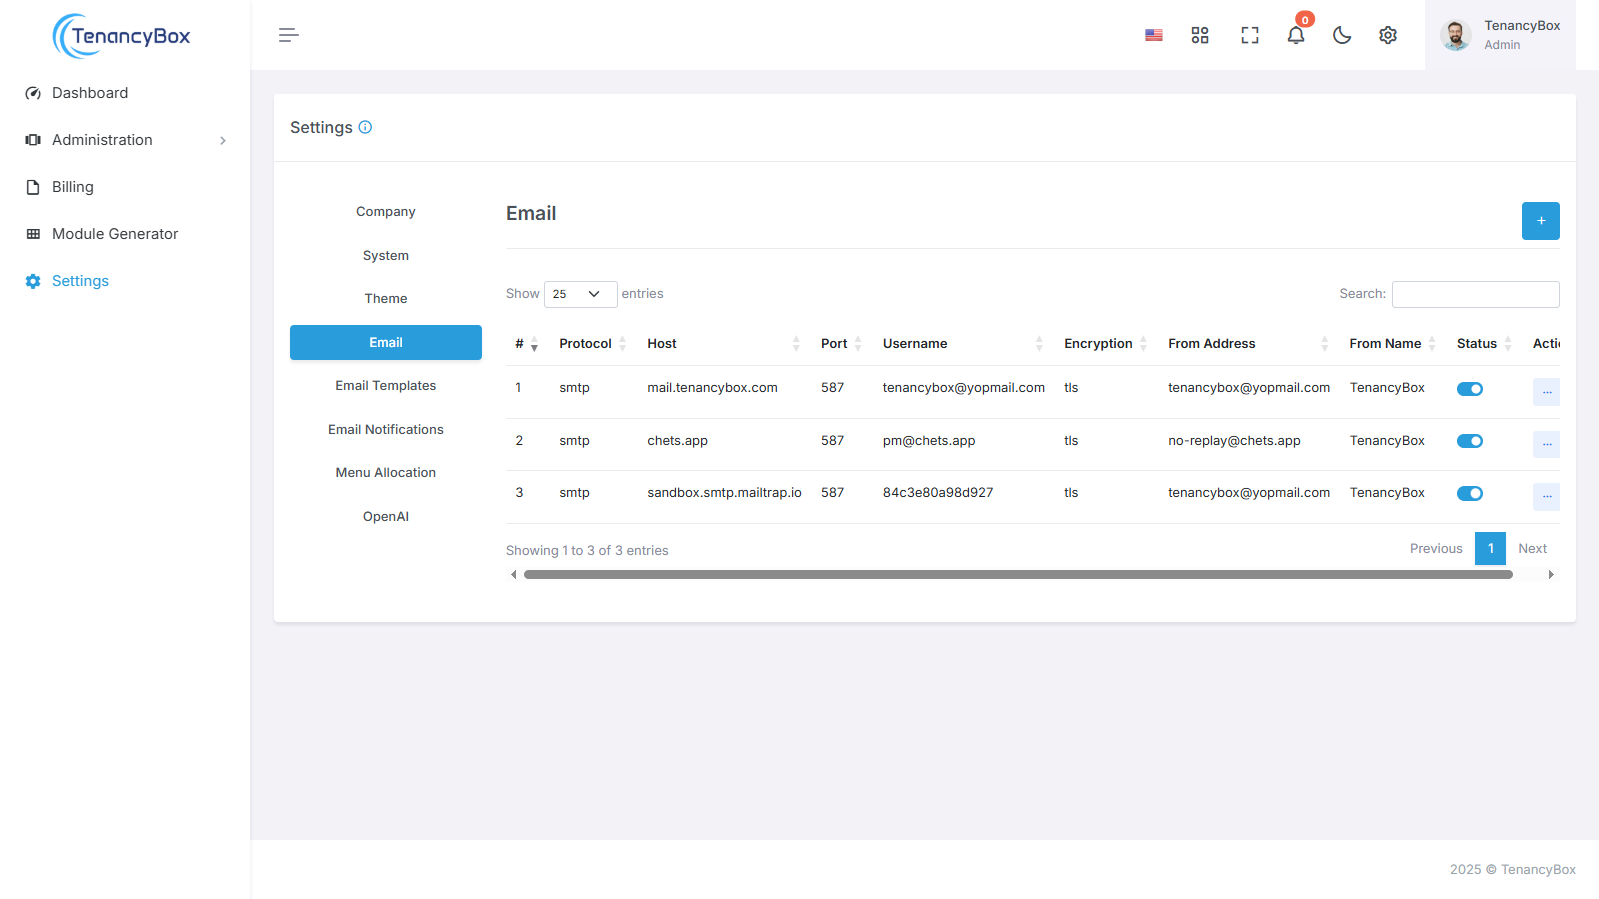
- Mail Protocol:Your mail protocol for ex. SMTP.
- Mail Host: Your SMTP mail server host.
- Mail Port: Outgoing mail port.
- Mail Username:Outgoing mail address.
- Mail Password:Outgoing mail password.
- Mail Encryption:It should be tls or SSL.
- Mail From Address:It refers to the sender's email address.
- Mail From Name:It refers to the sender's name.
- Limit On Campaign Outgoing Mail:It refers to the maximum number of emails that can be sent as part of a campaign per Hour.
By configuring these email settings with your preferred mail protocol, host, port, and security options, you can ensure reliable and secure outgoing mail, enhancing communication and professionalism across the system.
Email Templates
To modify the content of email templates and include dynamic variables for personalized subject lines and messages, follow these steps:
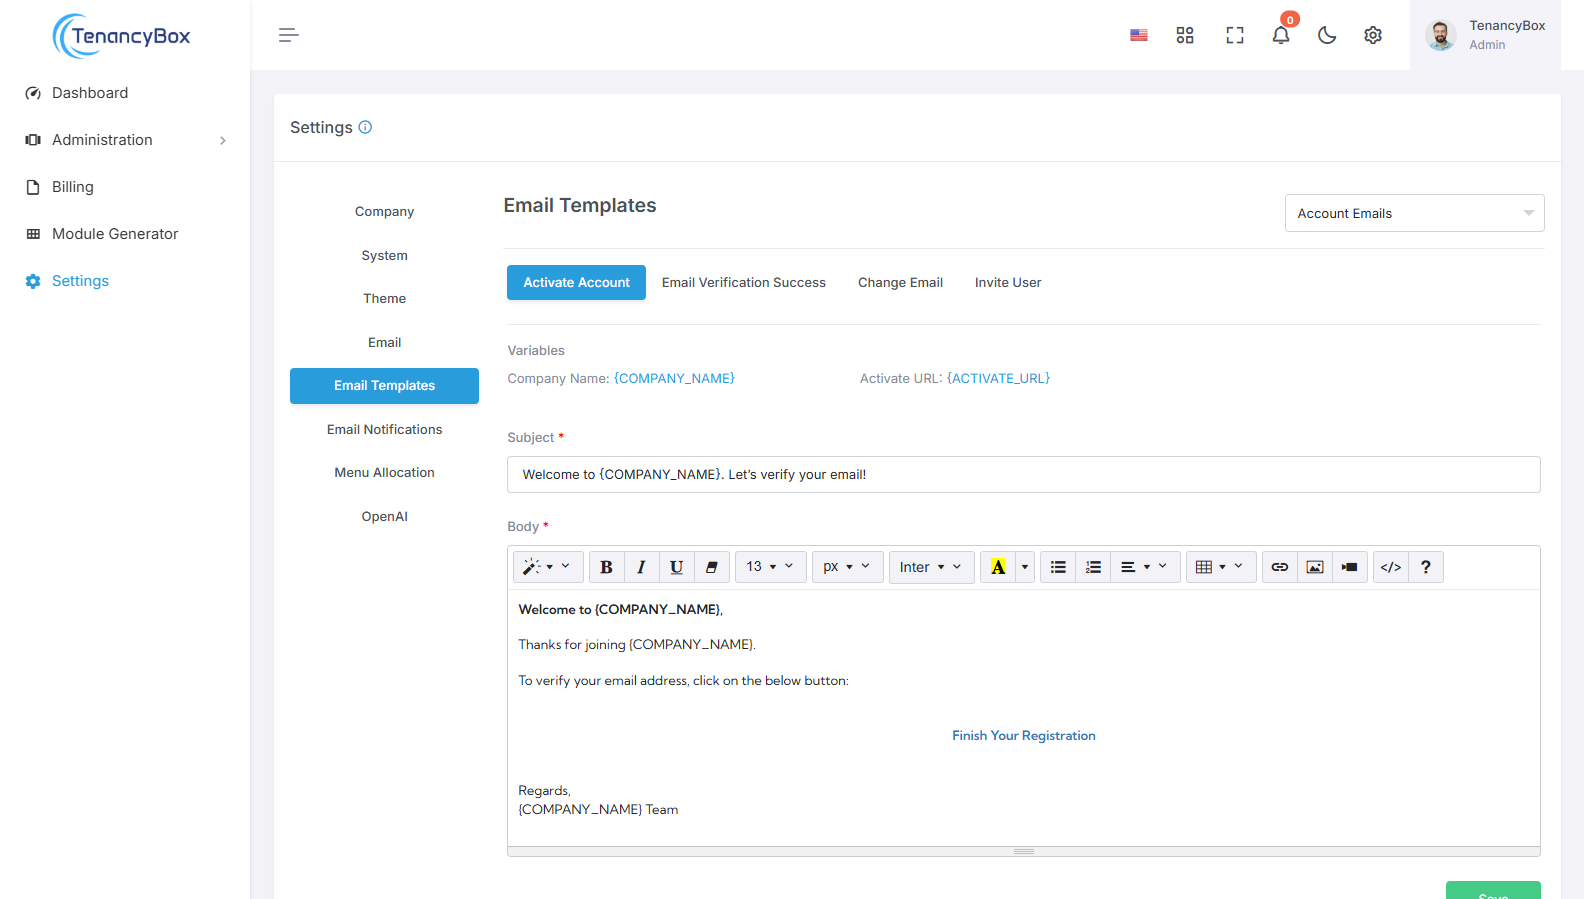
- Subject: Customize the subject line of the email template to include dynamic variables such as {USERNAME}, {COMPANY_NAME}, etc. These variables will be replaced with actual user-specific or system-specific values when the email is sent.
- Message: Modify the body of the email template to include dynamic variables for personalized messages. Incorporate placeholders such as {USERNAME}, {COMPANY_NAME}, etc., which will be replaced with relevant information based on the recipient or system context.
By leveraging dynamic variables within email templates, you can tailor communications to individual users or situations, enhancing engagement and relevance.
Email Notifications
To manage email notifications for specific modules, follow these steps:
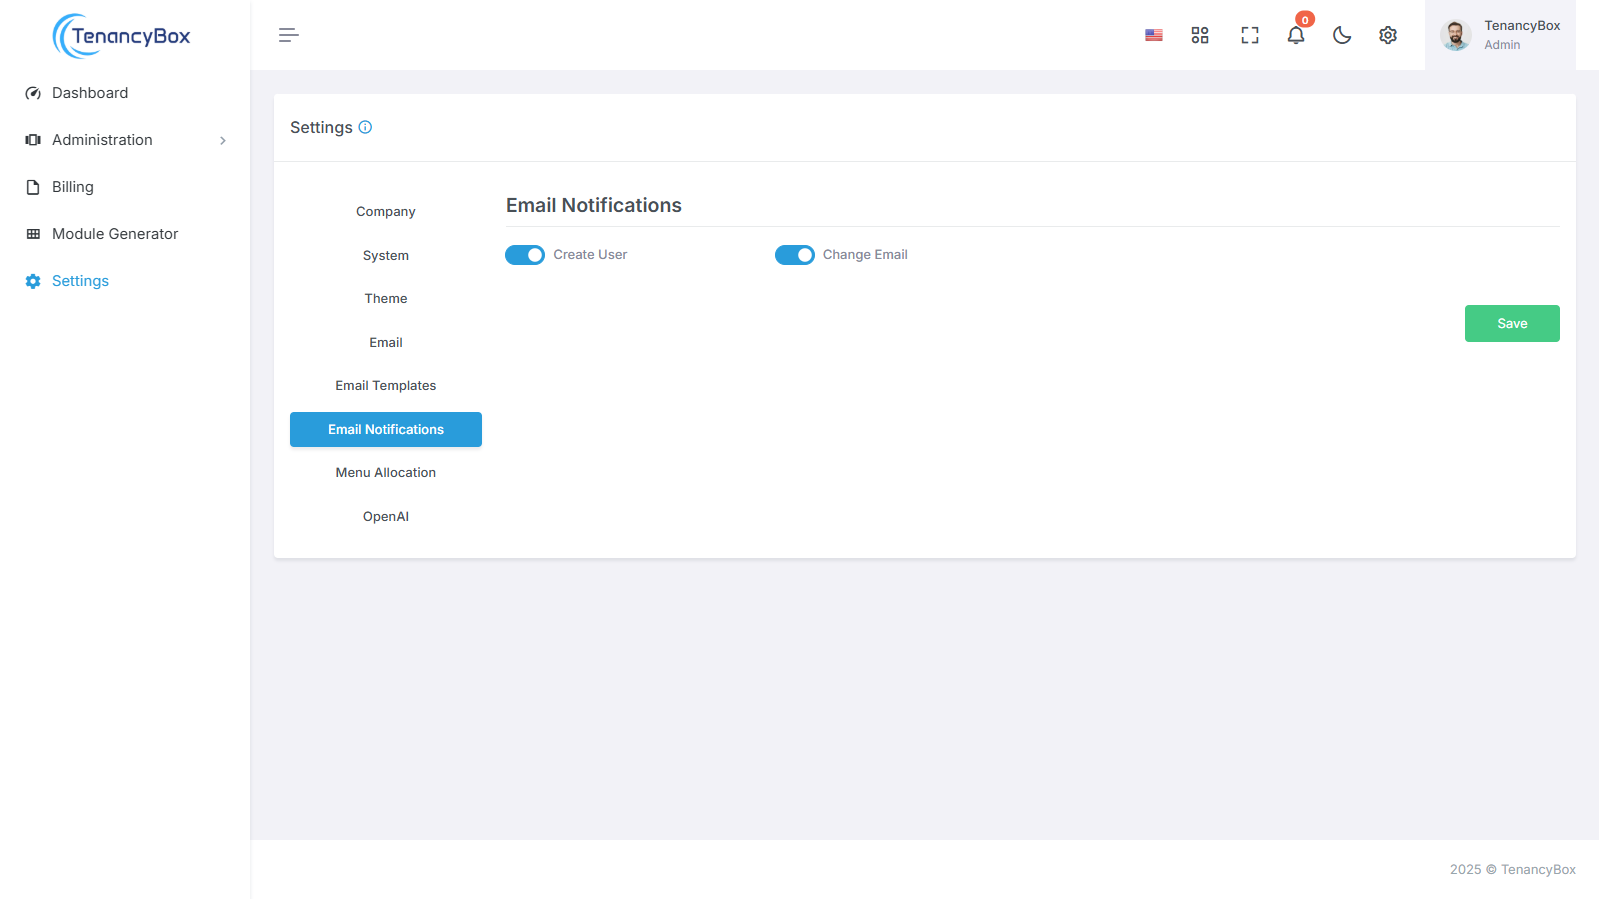
- Access the Email Notifications section in your system settings.
- You will find a list of modules for which email notifications can be configured. These may include:
- Create User
- Change Email
- Toggle the settings for each module to turn email notifications on or off based on your requirements.
- Save the changes to update your email notification preferences.
By customizing email notification settings for individual modules, you can tailor your communication preferences and stay updated on specific activities relevant to your workflow.
Menu Allocation
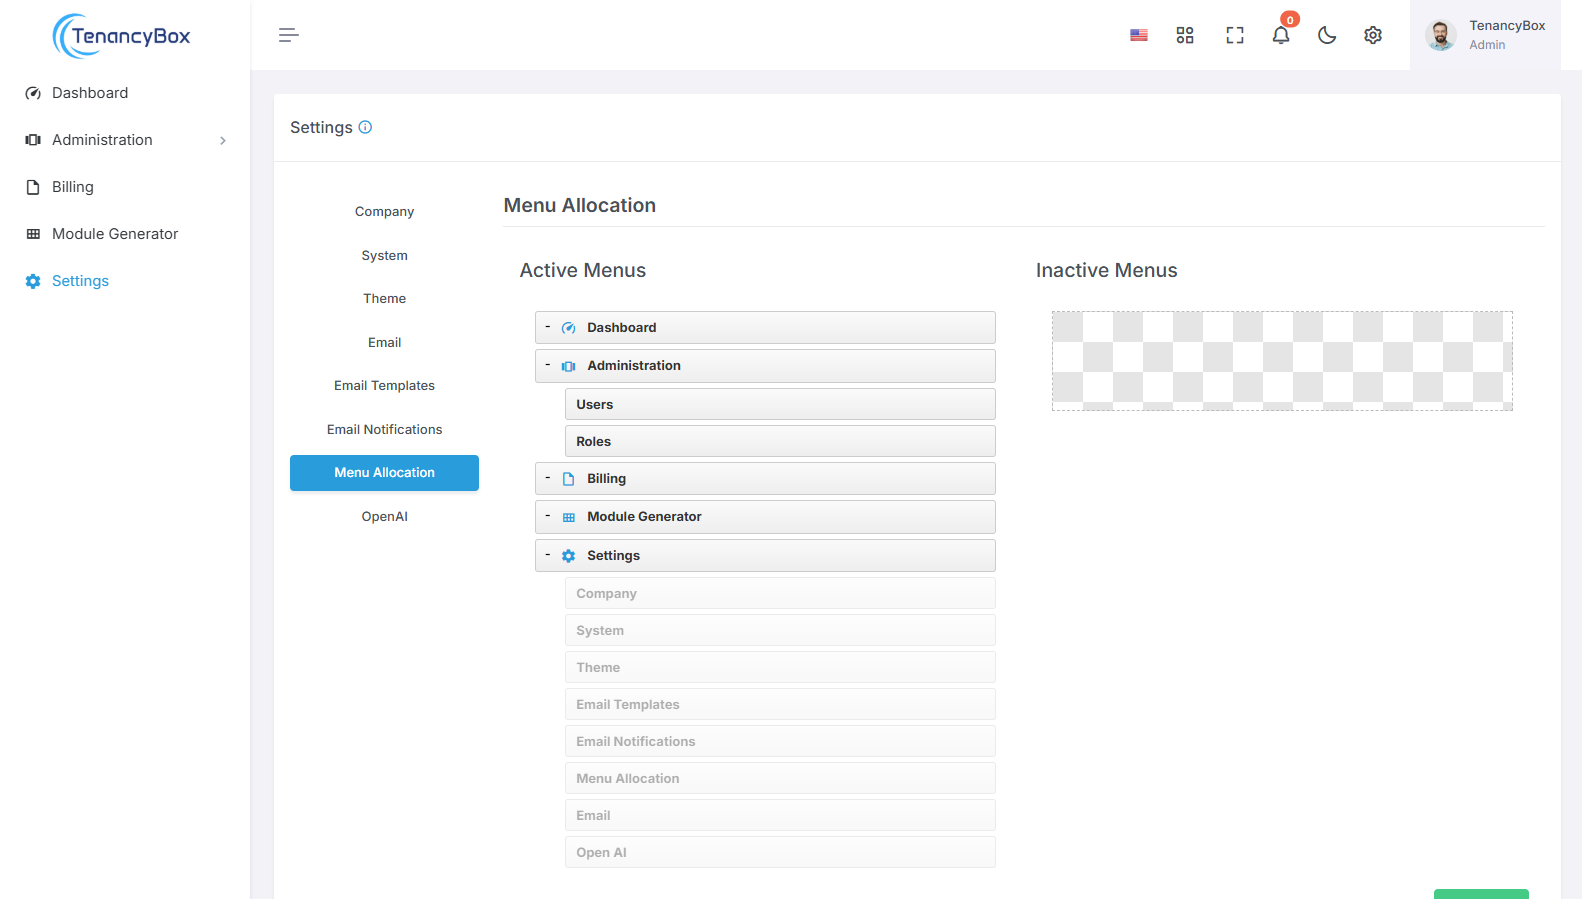
Drag and Drop: Click and drag the menu items to rearrange their position within the sidebar. This intuitive action allows you to organize the menu according to your preferred order.
Activate/Inactive: Enable or disable menu items by dragging and dropping them. Simply move the menu item to the desired section of the sidebar to activate or deactivate it.
By utilizing the drag-and-drop functionality, you can effortlessly adjust the layout and content of your sidebar menu, ensuring easy access to the most relevant features and functionalities based on your style and workflow requirements.
Open AI
Integrate OpenAI with your platform using API keys, enabling advanced AI-driven features such as text generation and image creation.
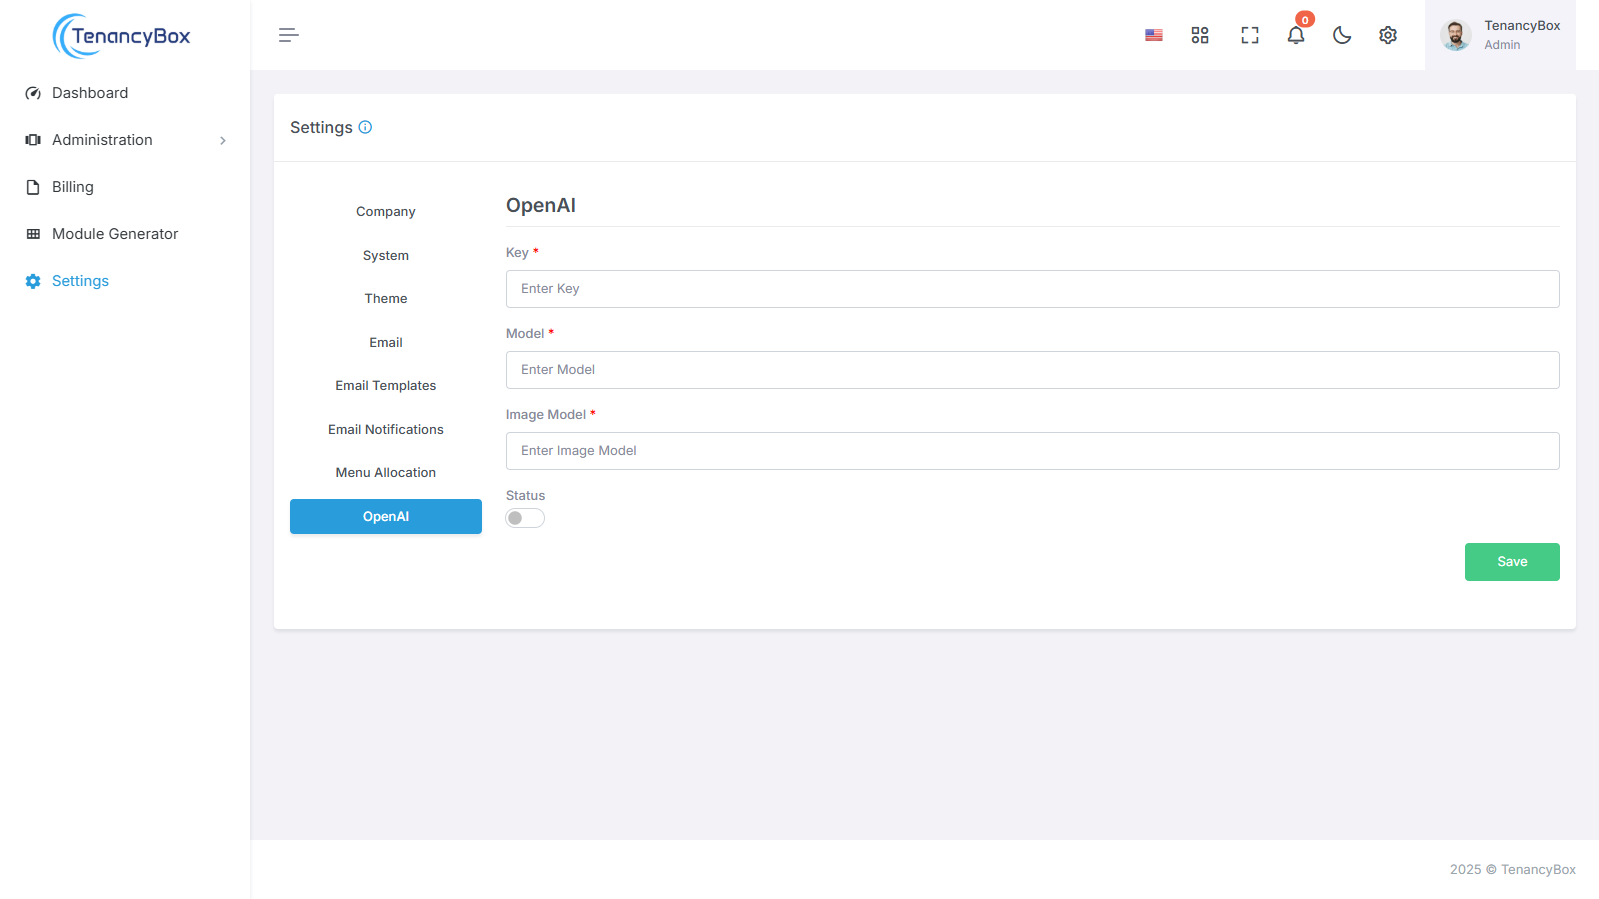
OpenAI Integration: Utilize Open AI's powerful AI models by configuring API keys, model selection, and status monitoring for seamless AI-driven functionalities.
AI-Powered Features: Enable AI capabilities in your system by configuring Open AI keys, selecting text and image modules, and monitoring status for optimized performance.
This comprehensive guide covers the configuration of various settings within the TenancyBox tool integration. Users can efficiently manage and customize each aspect to tailor the platform to their specific business needs and streamline operations effectively.